Wednesday, December 29, 2010

Free Pattern: Morning Dew, a seamless topdown top


Free pattern for Morning Dew top is now available to download on Ravelry or from my blog if you not registered with Raverly site. Please refer to the previous post for more pictures and information on this project. I would love to see this top knitted by others :-))) Please drop me a line if you decide to knit one :-))

Happy Holidays everyone. May coming year bring only happiness and joy to all of you. :-))))

Saturday, December 25, 2010

Morning Dew: Kidsilk Seamless Top

When the dew is on the grass,
rain will never come to pass;
When grass is dry at morning light,
look for rain before the night.

weather folklore

The top is seamless and knitted from the top, my favorite method to knit lately  ;-)) This time I tried raglan sleeves and I love how they fit. The top has a wide lace trim on the sleeves and the body. The lace pattern is an Estonian lace pattern called "wallpaper". I have used about 674.8 yards (617.0m) of BBB Filati Soft Dream and  US 4 - 3.5 mm in colorway 027. More pictures and information on Ravelry.


I am going to write the pattern in the coming days. This was an easy and fast knit :-)) I love seamless construction for kidsilk. In my opinion seams are not a good choice for kidsilk yarn. What do you think? :-))

Топ свяазан без швов сверху вниз с рукавом реглан. Кайма по телу и рукавах связанна узором "обои" популярным в вязании Естонких шалей. Информацию о пряже и фотографии процесса можно посмотреть на Ravelry.В ближайшие дни постараюсь написать инструкции. Топом довольна. На мой взгляд безшовная конструкция идеальна для вязния из деликатного кидсилка. А что вы думаете? ;-)))

Tuesday, December 21, 2010

Confessions of a Shawlaholic. Part I.

It all started pretty innocent. After being registered on Ravelry for less then half a year, I finally started noticing all the beautiful shawls people have knitted. I wanted to try to make one too, but had no idea how do you knit one. For my first triangular shawl I have chosen this simple garter stitch shawl by Kate Gagnon Osborn.
I thought it would be a perfect project to understand the construction of topdown shawl. You can find more details on this project on Ravelry.

I really loved that little kerchif and the addiction to shawl knitting have began ;-))) 
Next came Ulmus by Kirsten Kapur This is probably the shawl I have been wearing the most so far. More on this project on Ravelry.


Then I knitted a little scarf/shawl called Saroyan by Liz Abinante. It turned out to be very wearable little scarf and easy to knit. More on this project on Ravelry.
My first shawl from a really thin 2 ply yarn, kidsilk actually, came out of my fascination with the lace pattern that I saw used in a top in one of Ravelry patterns and just wanted to use. So, I came up with idea of this stole. Thinking back I should have CO with provisional CO in the middle and knit in both directions, so the edge looks the same on both sides. Instead I just CO and knitted. I love this shawl. I have gifted it to my mom last weekend :-))) I knew that she liked it a lot ;-))) The shawl was named Frost and more pictures can be found on Ravelry.


To be continued............... :-))))) 

Tuesday, December 14, 2010

Here Comes the Sun

I am very exited about my very first pattern design on Ravelry. This is also my first shawl design. “HERE COMES THE SUN” is a seamless shawl knitted top-down from the central neck stitches to the edge. The shawl is shaped as a semi-circle. The sample shawl in the photographs was knitted with 7 repeats of the pattern and after blocking was 142 cm (56 inches) for the straight edge on the top of the shawl and 60 cm (23.5inches) for the height of the shawl at the center. You can easily make it bigger or smaller by adding or taking away pattern repeats. 
I used Madelinetosh tosh merino light (100% Merino, fingering 4-ply) in colorway Caravan. 1.4 skeins = 616.0 yards (563.3m) was used for the sample shawl.

The project page can be found here
The pattern is available for download on RAVELRY 


Sunday, December 12, 2010

Winter Wheat: a seamless cardigan.

My goals for this project were to knit a seamless cardigan from the top with a seamless set-in sleeves and flowing front panels without button band.  I was following recommendations from B.G. Walker book “Knitting from the Top” on how to go about knitting seamless set-in sleeves. There are two ways to go about it and I choose the one where sleeves are knitted at the same time as the body. This  is the very first time I have tried on my own to knit in this way from scratch.  The cardigan is worked form the top starting with provisional CO for the back. The shoulders are shaped by short rows. Then a neck band is knitted separately starting from the middle of it also with a provisional CO. Once the neckband is of sufficient lengths, it has to be incorporated into the front panels. Front panels shoulders are also shaped by short rows. Once the 1/3 of the around the upper arm length is knitted for the front and back, the stitches (1/3 of the around the arm measurement) are picked up along the sides for the sleeves. Then, front, back and sleeves are knitted together with the sleeves stitches added at even intervals until there are enough sts. for the sleeves and the knitting is at the underarm point. Now, the sleeves are separated from the body, to be knitted later, and the body of the cardigan is knitted until the desired length. I tried to capture step by step process in the photographs I have posted on RAVELRY ;-)) I hope you find them helpful.
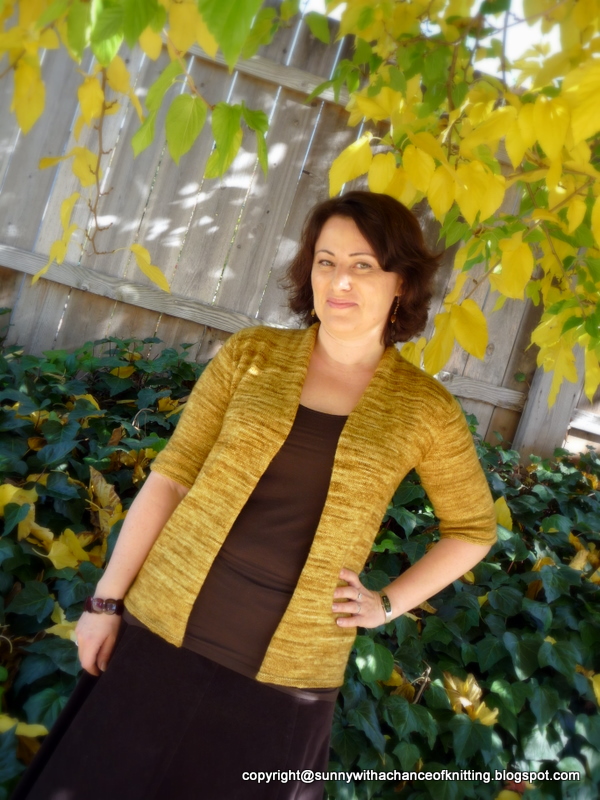
I have used 2.8 skeins = 1232.0 yards (1126.5m) MadelineTosh merino light in colorway Winter Wheat and US2 needles.Cardigan gauge before and after blocking 28stsx40 rows in 4x4 inch in St. st. My measurements must be a little off, since cardigan did stretched a little in length and even less so in width.
The fit of sleeves in the armholes turned out  OK. However, after knitting this project I understand now how better fit can be achieved,…it is a learning process ;-))) Overall, I am very happy with the result :-))

Цель этого проекта была связать безшовный кардиган сверху с открытыми полочками без пуговиц и с втачными рукавами, связанными безшовно.  Я пользовалась книгой B.G. Walker  "Knitting from the Top”. Очень рекомендую эту книгу если вас интересует безшовное вязание. Там вы не найдёте дословных инструкций. Эта книга-учебник в которой разъяснены концепции  различных безшовных моделей связанных сверху без швов. Втачные рукава сверху без швов можно вязать двумя способами. Я выбрала метод в котором рукава вяжутся одновременно с телом до подмышек, а далее они вяжутся вкруговую отдельно. Я уже вязала такую конструкцию в прошлом, но по уже готовому описанию. Этот кардиган мой первый самостоятельный проект такого дизайна.
Кардиган начинается набором на вспомогательную нитку петель для спинки. После спинка вяжется отдельно укороченными рядами для скосов плечей до того пока расстояние не будет 1/3 от окружности руки в предплечье. Далее вяжется начало воротника путём набора петель на вспомогательную нить в центре воротника. От этих петель вяжем в обе стороны пока длина не будет равна расстоянию оставленному на спинке для выреза. Затем подсоединяем к воротнику методом укороченных рядов петли на полочки и уже вяжем воротник и полочки вместе до той же длины что и спинка. Следующий шаг это набор петель для рукавов вдоль боковых швов переда и спинки. Количество набранных петель должно быть равно 1/3 окружности руки в предплечье. Далее вяжем все детали вместе до подмышек, постепенно прибавляя петли для рукавов. Теперь снимаем петли для рукавов на вспомогательные спицы или нитку, добавляем петли для подмышек и вяжем кардиган до нужной длины. Затем рукава вяжутся отдельно на 5 спицах. Фотографии описанных выше шагов можно посмотреть на RAVELRY Надеюсь вы найдёте их информационными.
Кардиганом довольна, что наверное очевидно по количеству фотографий и улыбке ;-)))))
 
You can find this project  on RAVELRY.


Friday, December 10, 2010

BIG SUR

In August I was vacationing in the Big Sur area with my family. Some of you have asked me to share the pictures from that trip. I want to start my blog with this post of the breathtakingly beautiful Central California cost. Since this is going to be a knitting blog ;-))) I will first mention two projects that were knitted or photographed during that trip. First is the shawl called "The road to Big Sur" You can find all the details about this project on Ravelry
В Августе я была с семьёй в отпуске по побережью Центральной Калифорнии. Я обещала поделиться фотографиями с моими друзьями. С этого и начну мой блог :-)) Конечно, этот блог будет в основном про вязание и поэтому хочу показать два проекта связанных с отпуском. Шаль для меня была связанна в машине по дороге ;-)) а шаль для дочки была сфотографирована на горной речушке в палаточном городке :-))


Next project is Little Shells. This is a shawl I have knitted for my daughter. The photographs were taken at the Big Sir campground. the project can be also found on Ravelry.


Here are some photographs from that trip :-))